
Remodeling a home isn’t about tearing down walls for the sake of change. It’s about addressing the foundational elements, structure, layout, materials, and function, that define how a space works and feels. Element home remodeling focuses on these core components, treating each room as a system where flooring, walls, lighting, and fixtures all interact. Whether upgrading a single bathroom or overhauling an entire floor plan, understanding which elements to prioritize makes the difference between a cosmetic refresh and a transformation that adds real value. This guide breaks down the planning, execution, and decision-making involved in tackling element-based remodels in 2026.
Table of Contents
ToggleKey Takeaways
- Element home remodeling targets foundational building blocks like framing, electrical, plumbing, and insulation rather than cosmetic updates, extending home lifespan and ensuring code compliance.
- Budget 10–20% contingency for unexpected conditions, and allocate costs across labor (30–40%), materials (40–50%), permits and design (10–15%), with regional variations significantly affecting pricing.
- Element remodels require 3–6 weeks for bathrooms and 8–12 weeks for kitchens with structural changes, plus permit inspections and material lead times that can add weeks to your timeline.
- Hire licensed contractors for structural, electrical, plumbing, HVAC, and roofing work to meet building codes and protect your insurance, while DIY-friendly tasks include demolition, insulation, painting, and fixture installation.
- Skip permits, ignore load-bearing walls, rush material selection, or underestimate prep work at your peril—these common mistakes can lead to code violations, structural damage, safety hazards, and costly repairs.
What Is Element Home Remodeling and Why Does It Matter?
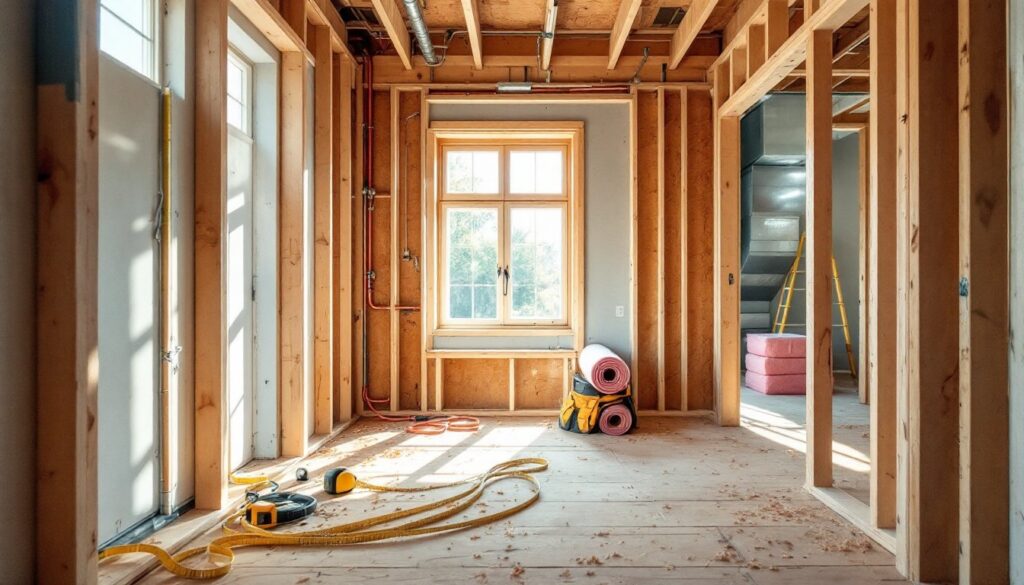
Element home remodeling targets the individual building blocks of a space rather than surface-level aesthetics. Think of it as renovating by system: structural framing, electrical, plumbing, HVAC, insulation, drywall, flooring, cabinetry, and trim. Each element plays a role in durability, efficiency, and livability.
This approach contrasts with cosmetic updates like repainting or swapping hardware. Element remodeling often involves opening walls to access studs, running new wiring to code, replacing subfloor before laying tile, or upgrading windows for better thermal performance. It’s the difference between staging a room and rebuilding it to solve underlying problems.
Why does this matter? Because piecemeal fixes rarely address root issues. A leaky basement isn’t solved by waterproof paint if the foundation drainage is failing. Outdated knob-and-tube wiring won’t support modern appliances, no matter how many outlets you add. Element-focused projects extend the lifespan of a home, improve safety, and align upgrades with current building codes, critical for resale and insurance.
Key Elements to Consider Before Starting Your Remodeling Project
Before the first board gets cut, pin down the scope, budget, and timeline. Element remodeling exposes hidden conditions, rotted sill plates, outdated electrical panels, asbestos-wrapped ducts, that can derail a project if you haven’t built in contingency.
Budget Planning and Cost Breakdown
Allocate 10–20% of your total budget as contingency for unknowns. For a $50,000 kitchen remodel, that’s $5,000–$10,000 set aside for surprises like water damage behind the sink or a subfloor that needs replacement.
Break costs into categories: labor (typically 30–40%), materials (40–50%), permits and design (10–15%), and contingency. Material costs fluctuate, lumber prices spiked in 2021 and leveled off, but supply chain shifts in 2026 still affect availability. Get quotes from multiple suppliers and lock in pricing where possible.
Expect rough ranges for common element upgrades:
- Electrical panel upgrade: $1,200–$3,000 depending on amperage (100A to 200A)
- HVAC replacement: $4,000–$8,000 for a central system in a 1,500 sq ft home
- Subfloor replacement: $2–$7 per sq ft including labor
- Window replacement: $300–$1,000 per window (vinyl to wood-clad)
These vary by region, material grade, and labor rates. Don’t rely on national averages alone, get local bids.
Timeline and Project Scope
Element remodels take longer than cosmetic ones. Framing, electrical, and plumbing require inspections at multiple stages, which can add days or weeks depending on your jurisdiction’s permitting backlog.
A typical bathroom gut-and-rebuild runs 3–6 weeks. A kitchen with structural changes, new plumbing, and electrical upgrades can stretch to 8–12 weeks. Factor in material lead times, custom cabinetry, appliances, and specialty tile can take 6–10 weeks to arrive.
Define the scope clearly: Which elements are non-negotiable? Where can you phase work if budget runs tight? Deciding upfront whether you’re upgrading HVAC, insulation, and windows together, or tackling them in stages, affects both timeline and contractor availability.
Popular Element-Based Remodeling Projects for Maximum Impact
Certain element upgrades deliver outsized returns in comfort, efficiency, and resale value. These projects address function first, aesthetics second.
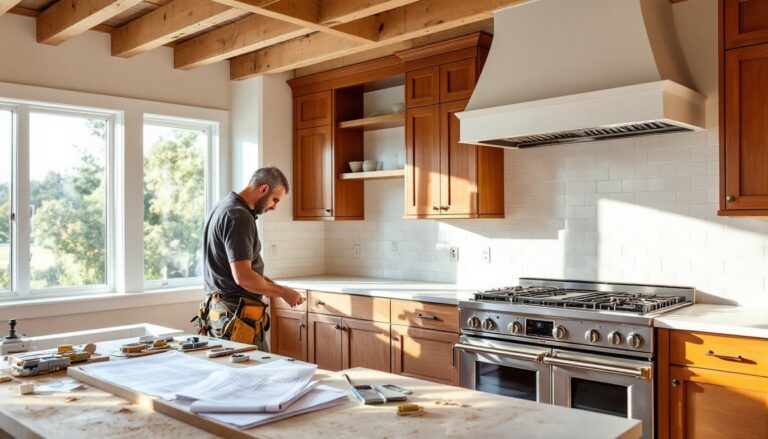
Kitchen remodels rank high because they touch multiple elements: cabinets, countertops, plumbing, electrical (often requiring 20A dedicated circuits for appliances), flooring, and lighting. Upgrading to energy-efficient appliances and LED under-cabinet lighting reduces long-term operating costs. If walls are open, add outlets to meet NEC requirements (no point along a wall should be more than 6 feet from an outlet).
Bathroom renovations focus on wet-area elements: waterproofing (cement backer board or waterproof membranes like Schluter Kerdi), proper shower pan installation, ventilation (exhaust fans rated for CFM based on room size), and GFCI outlets within 6 feet of water sources. Replacing a standard tub with a walk-in shower improves accessibility and often increases home appeal.
Flooring upgrades affect every room. Replacing carpet with luxury vinyl plank (LVP) or engineered hardwood adds durability and simplifies cleaning. Subfloor prep is critical, level to within 3/16 inch over 10 feet for plank flooring, and ensure moisture barriers in basements or over crawl spaces.
Insulation and air sealing projects, blown-in cellulose in attics, spray foam in rim joists, or rigid foam on basement walls, cut heating and cooling costs by 15–30%. These aren’t glamorous, but they’re among the most cost-effective element upgrades. Many homes using classic restoration techniques prioritize envelope improvements before cosmetic finishes.
Window and door replacement improves thermal performance and curb appeal. Low-E glass and argon-filled double panes reduce heat transfer. Proper flashing and sealing during installation prevents air and water infiltration, which can rot framing over time.
Working with Contractors vs. DIY: Making the Right Choice
Element remodeling often crosses the line from DIY-friendly to professional territory. Knowing where that line sits saves time, money, and potential code violations.
Hire a licensed contractor for:
- Structural changes (removing load-bearing walls, adding beams, sistering joists)
- Electrical work beyond simple fixture swaps (panel upgrades, circuit additions, rewiring)
- Plumbing rough-in and venting (drains, water supply, gas lines)
- HVAC installation and ductwork modifications
- Roofing and exterior envelope work (flashing, sheathing, siding over insulation)
Most jurisdictions require permits for these tasks, and inspectors expect work to meet IRC (International Residential Code) or local amendments. Unlicensed work can void homeowner’s insurance and complicate resale.
DIY-friendly element tasks include:
- Demolition (removing drywall, old flooring, cabinets, wear safety goggles, gloves, and a dust mask)
- Insulation installation (batts, rigid foam, or blown-in if you rent equipment)
- Painting and finishing (primer, caulk, trim work)
- Flooring installation (LVP, laminate, or engineered wood, hardwood nailing requires more skill)
- Fixture installation after rough-in is complete and inspected
A hybrid approach works well: hire pros for rough-in, then handle finish work yourself. For example, let an electrician run wiring and install boxes, then you install switches, outlets, and light fixtures after inspection.
Vetting contractors is non-negotiable. Check licenses, insurance, and references. Ask for a detailed bid breaking out labor, materials, and permits. Red flags include cash-only requests, no written contract, or pressure to skip permits. Detailed planning resources from sites like ImproveNet help homeowners compare bids and understand fair pricing.
Common Mistakes to Avoid in Element Home Remodeling
Even experienced DIYers stumble on element remodels. Here’s where projects go sideways and how to avoid it.
Skipping permits. It’s tempting to avoid the paperwork, but unpermitted work can derail a home sale, complicate insurance claims after damage, and leave you liable for code violations. If you’re opening walls, moving plumbing, or adding circuits, pull permits.
Ignoring load-bearing walls. Not every wall can come down. Load-bearing walls carry weight from the roof or upper floors to the foundation. Removing one without installing a proper beam and support posts can cause sagging floors or roof failure. When in doubt, consult a structural engineer, typically $300–$800 for a site visit and report.
Rushing material selection. Hardwood flooring needs to acclimate in the room for 3–7 days before installation to adjust to humidity. Skipping this causes gaps or buckling. Likewise, don’t mix drywall thicknesses (1/2 inch on studs, 5/8 inch on ceilings for sag resistance) or cheap out on moisture-resistant drywall in bathrooms.
Underestimating prep work. Paint won’t stick to glossy surfaces without sanding or deglosser. Tile won’t bond to a flexing subfloor, add a second layer of 1/2-inch plywood or cement board to stiffen it. Clean, level, and prime surfaces before finish work.
Neglecting ventilation. Bathrooms need exhaust fans rated for at least 50 CFM, vented to the exterior (not into an attic). Kitchens benefit from range hoods vented outside. Poor ventilation traps moisture, leading to mold and rot.
DIYing beyond skill level. Confidence is good: overconfidence is expensive. If you’ve never soldered copper pipe, a whole-house repipe isn’t the time to learn. Start with smaller element projects, replacing a toilet flange, adding a light fixture, before tackling complex rough-in work. Reviewing project portfolios from experienced home remodeling professionals can help set realistic expectations for scope and finish quality.
Forgetting safety gear. Demolition kicks up dust, fiberglass insulation irritates skin and lungs, and power saws throw debris. Wear safety goggles, gloves, a respirator (N95 or better), and ear protection for loud tools. Long sleeves and pants prevent cuts and scrapes. Keep a first-aid kit and fire extinguisher on site.
Element home remodeling is methodical, not magical. It demands planning, respect for building science, and honest assessment of skill. Tackle it with the right prep, and the results are spaces that function better, last longer, and add real value to a home.