
Building a home theater isn’t just about buying a big screen and some speakers. The layout determines whether the space delivers an immersive cinematic experience or becomes a frustrating room that nobody uses. Everything from the room’s shape to where someone places each speaker affects sound quality, sight lines, and comfort. Getting the layout right from the start saves money, eliminates rework, and creates a space that rivals commercial theaters. This guide walks through the critical decisions that turn an ordinary room into a dedicated entertainment zone.
Table of Contents
ToggleKey Takeaways
- A well-planned home theater room layout balances sightlines, acoustics, and ergonomics to deliver an immersive cinematic experience that rivals commercial theaters.
- Ideal dimensions for a dedicated home theater are approximately 13 feet wide by 19 feet long with at least an 8-foot ceiling, and rectangular layouts naturally distribute sound more evenly than square rooms.
- Seating distance from the screen should follow the Society of Motion Picture and Television Engineers (SMPTE) recommendation of 30-40 degrees viewing angle, with minimum distance calculated by multiplying screen diagonal by 1.2 for 4K content.
- Strategic speaker positioning for home theater acoustics includes front speakers at a 22-30 degree angle from the seating position, surround speakers at 90-110 degrees, and subwoofer placement optimized through the “subwoofer crawl” method.
- Acoustic treatment starting with first reflection points and the addition of bass traps in room corners, combined with proper lighting control and HVAC management, transforms an ordinary room into a dedicated entertainment zone.
- Tiered seating with 12-inch risers per row and 36 inches of clearance behind the back row ensures comfortable viewing and unobstructed sightlines for multiple-row layouts.
Understanding the Fundamentals of Home Theater Room Design
A successful home theater layout balances three core elements: sightlines, acoustics, and ergonomics. Each influences the others, so planning holistically prevents compromises later.
Sightlines ensure every seat has an unobstructed view of the screen at the correct angle. Acoustics control how sound behaves in the space, reflections, dead zones, and bass response all depend on room geometry and materials. Ergonomics covers seating comfort, control access, and foot traffic patterns.
Most home theaters fall into two categories: dedicated rooms (sealed spaces used only for viewing) and multipurpose rooms (family rooms or basements with dual functions). Dedicated rooms offer better acoustic control and light management. Multipurpose layouts require compromise but can still deliver excellent results with thoughtful design.
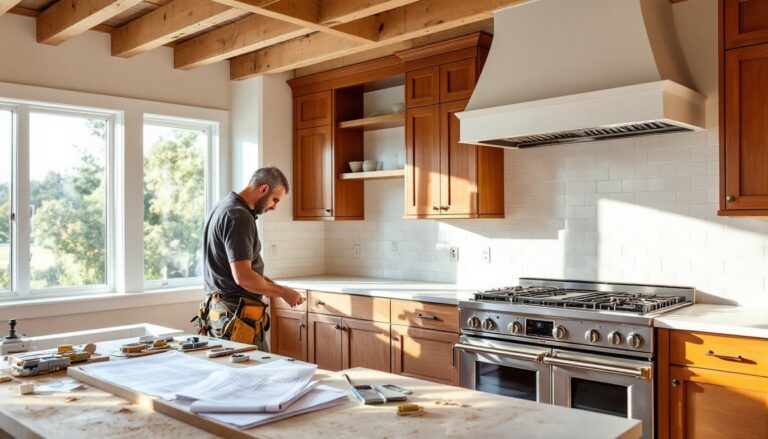
Before selecting equipment, homeowners should assess the room’s existing conditions: ceiling height, wall construction (drywall over studs vs. concrete), HVAC placement, electrical access, and load-bearing walls. Structural modifications like moving walls or adding soundproofing require permits in many jurisdictions and may need an engineer’s review if load-bearing elements are involved.
The layout process starts with measuring the room accurately and noting any fixed obstacles, support columns, windows, doors, ductwork. These constraints shape the available options.
Choosing the Right Room Dimensions and Shape
Room dimensions directly impact sound quality. Certain ratios minimize standing waves, resonances that create boomy bass or dead spots. The golden ratio (1.6:1 length-to-width) is a starting point, but practical ratios like 1.4:1 or 1.9:1 also work well.
Ideal minimum dimensions for a dedicated home theater are approximately 13 feet wide by 19 feet long with at least an 8-foot ceiling. Smaller rooms work but limit seating capacity and bass response. Larger rooms require more powerful equipment and additional acoustic treatment.
Square rooms and rooms with identical dimensions (like 15×15 feet) amplify standing waves, making bass uneven across seating positions. Rectangular layouts naturally distribute sound more evenly. If stuck with a square room, strategic acoustic panels and bass traps become essential.
Ceiling height affects overhead speaker placement for Dolby Atmos or DTS:X configurations. Heights below 8 feet make overhead channels less effective. Vaulted or angled ceilings complicate speaker placement but can reduce flutter echo between parallel surfaces.
Basement rooms offer natural sound isolation from the rest of the house but may have low ceilings (7-8 feet) and concrete walls that reflect sound harshly. Bonus rooms or converted bedrooms typically have standard 2×4 or 2×6 stud walls, which transmit sound unless upgraded with additional mass or decoupling techniques. Many home theater room layout strategies focus on managing these structural challenges from the outset.
Optimal Seating Arrangement and Viewing Distance
Seating distance from the screen determines both screen size and viewer comfort. The Society of Motion Picture and Television Engineers (SMPTE) recommends a viewing angle of 30-40 degrees for immersive viewing. For a 100-inch diagonal screen, this translates to seating distances between 10 and 13 feet.
Calculate minimum seating distance by multiplying screen diagonal by 1.2 for 4K content (closer viewing works due to higher resolution) or 1.5 for 1080p. Maximum distance is about 2.5 times the screen diagonal before details become hard to see.
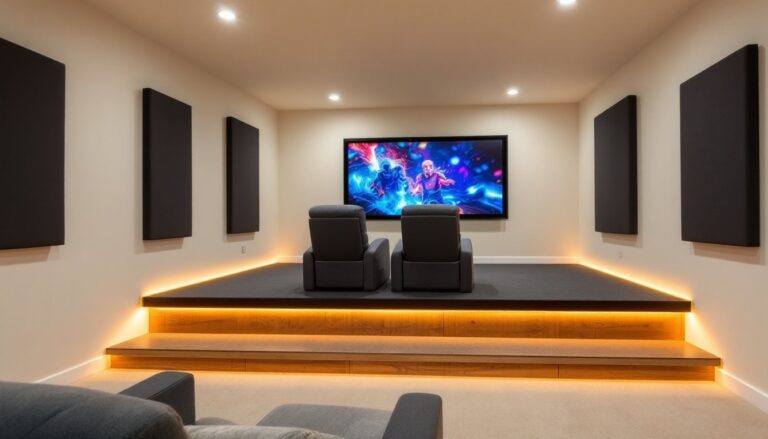
Tiered seating (riser platforms) solves sightline problems in rooms with multiple rows. Each riser should elevate the back row enough that viewers look over the heads of those in front. A 12-inch rise per row typically works, though this varies with seat height and screen placement. Building risers requires solid framing, usually 2×6 or 2×8 joists on 16-inch centers with ¾-inch plywood decking. Check local codes: some jurisdictions treat risers over a certain height as structural platforms requiring permits and railings.
Single-row layouts simplify construction and work well in smaller rooms (under 15 feet deep). For rooms accommodating two or more rows, stagger seats so no one sits directly behind another person.
Leave at least 36 inches of clearance behind the back row for walking and at least 24 inches between seat rows for legroom and egress. Recliners and powered seats require more depth, measure fully reclined before finalizing spacing.
Seat placement relative to side walls also matters for surround sound. The first row should sit at least 2-3 feet from side walls to avoid early reflections that muddy dialogue.
Screen Placement and Size Considerations
Center the screen on the primary viewing wall, ideally the shortest wall in a rectangular room. This maximizes seating distance and minimizes sound travel time from front speakers to the audience.
Screen height determines neck comfort. Position the screen so the bottom edge sits 24-36 inches above the finished floor for seated viewers. This puts the center of the screen roughly at eye level when seated. Higher placements cause neck strain during long viewings.
For projection setups, screen size depends on throw distance, the distance between the projector lens and the screen. Most home theater projectors have a throw ratio between 1.3:1 and 2.0:1. A 1.5:1 throw ratio means a projector placed 15 feet from the wall produces a 10-foot-wide image. Check the projector’s specs before finalizing screen size.
Fixed-frame screens deliver the flattest surface and best image quality but require permanent mounting. Motorized screens retract when not in use, preserving the multipurpose function of a room. Proper backing and installation of seating and screen arrangements can prevent common issues like screen sag or uneven tension.
For flat-panel displays, 65-85 inches suits most home theaters under 15 feet deep. Larger panels (98+ inches) exist but cost significantly more per inch than projectors at equivalent sizes.
Leave space around the screen for speakers. Front left, center, and right speakers should form an arc at roughly ear height when seated. The center channel typically mounts directly above or below the screen, close to the same vertical plane.
Speaker Positioning for Immersive Surround Sound
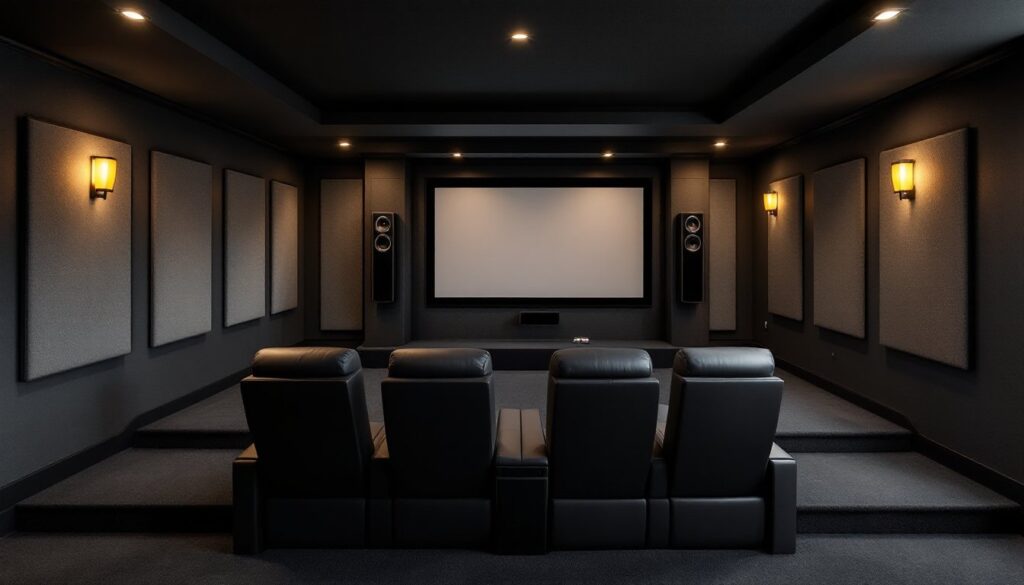
Speaker placement defines the soundstage. A 5.1 surround system includes front left, center, right, two surround speakers, and a subwoofer. 7.1 systems add rear surrounds. Atmos configurations (5.1.2, 7.1.4) add ceiling or upfiring speakers for overhead effects.
Front speakers should form a 22-30 degree angle from the primary seating position. Angle them inward (toe them in) slightly to aim at the center seat. Mount at ear height, typically 36-48 inches off the floor for seated listeners.
The center channel handles most dialogue and should align vertically with the screen center. Avoid placing it inside a cabinet or behind doors, which muffle high frequencies.
Surround speakers in a 5.1 setup sit 90-110 degrees from center, slightly above ear level (5-6 feet high). For 7.1, side surrounds move to 90 degrees and rear surrounds place at 135-150 degrees.
Subwoofer placement is less critical due to the non-directional nature of low frequencies, but corner placement amplifies bass through boundary loading (walls reinforce output). Alternatively, place the subwoofer at the primary seating position, play bass-heavy content, and crawl around the room’s perimeter listening for the smoothest bass response, that’s where the subwoofer should go (this is called the “subwoofer crawl”).
Atmos ceiling speakers should sit directly above or slightly in front of the seating area. In-ceiling speakers require cutting into drywall and mounting between joists (typically 16 or 24 inches on center). For rooms where cutting the ceiling isn’t practical, upfiring modules bounce sound off the ceiling. These work best with flat ceilings at least 8 feet high.
Run speaker wire before finishing walls if possible. Use at least 16-gauge wire for runs under 50 feet, 14-gauge for longer distances. In-wall wiring should be CL2 or CL3 rated to meet fire safety codes. Many installers use conduit for future upgrades.
Lighting, Acoustics, and Comfort Enhancements
Lighting control separates good home theaters from great ones. Ambient light washes out screen contrast, especially with projectors. Install dimmable LED recessed lights or sconces on a smart dimmer system. Position lights behind seating or along side walls to avoid reflections on the screen. Avoid lights directly above the screen.
Blackout curtains or cellular shades eliminate window light. For dedicated rooms, consider removing windows entirely and insulating the opening for better sound isolation.
Acoustic treatment manages reflections and reverberation. Untreated rooms sound echoey and muddy dialogue. Start with first reflection points, the spots on side walls where sound from front speakers bounces to the listening position. Place 2-inch thick acoustic panels at these locations. A second person with a mirror can help find them: sit in the main seat and have them move a mirror along the wall until the front speaker appears in the reflection.
Add panels at front wall corners and behind the seating area to absorb rear reflections. Bass traps in room corners control low-frequency buildup. Thick panels (4-6 inches) or purpose-built corner traps work best.
Carpet or thick area rugs reduce floor reflections. Avoid bare hardwood or tile in home theaters. Many experienced builders incorporate room design ideas that balance aesthetics with acoustic performance.
HVAC noise disrupts quiet scenes. If possible, zone the theater on a separate thermostat and use the system’s “quiet” or “low” fan setting. Inline duct silencers reduce air noise. Seal gaps around doors with weatherstripping and consider a solid-core door or double-door airlock entry for serious isolation.
Wall construction impacts sound transmission. Standard drywall on 2×4 studs provides minimal isolation. For better performance, use two layers of 5/8-inch drywall with Green Glue damping compound between layers, or install the drywall on resilient channels or staggered studs to decouple the wall surfaces. These modifications require understanding load distribution: consult local building codes and potentially a structural engineer for shared or exterior walls.
Comfort details matter for long viewing sessions: cupholders in armrests, side tables for snacks, a small beverage fridge in the back of the room, and ventilation to manage heat from equipment and occupants. Receivers and amplifiers generate significant heat, ensure rack cabinets have ventilation fans or leave fronts open.
Conclusion
A well-planned home theater layout maximizes every dollar spent on equipment. Room dimensions, seating geometry, speaker placement, and acoustic treatment all work together to create an immersive experience. Taking time upfront to measure, plan, and understand the trade-offs between dedicated and multipurpose spaces pays off in better sound, clearer images, and a room that gets used regularly rather than becoming a dusty showpiece.